Shop the New Holiday Catalog August 4th on the New Stampin' Up! Website


New Online Store  

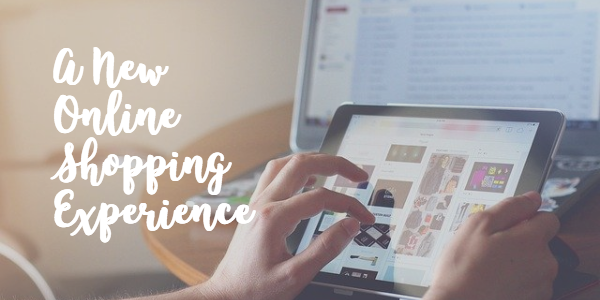
Beginning August 4th at 7:00 AM (MT) Stampin' Up! is bringing you a new and improved online shopping experience! 

There are quite a few improvements that you'll really like.  I'm most excited about the new site working seamlessly on desktops, smartphones, and tablets, larger images for products and samples, more intuitive navigation and searches, and last but not least, you can create a wish list and favorites! 

Rest assured your account information and password still work with the new site. Because this is a new site you will need to sign in the first time you shop. If you had your browser remember your email and password, it won't be saved anymore. If you are unsure of your login ID and password, I recommend using the Forgot Password link to reset your password as soon as possible (see steps below).  

I kindly ask that you visit my store starting August 4th, sign in, and please select me as your demonstrator. You may still use a demonstrator's host/hostess code with your order if you do that each time you order. You can do this by using the Find a Demonstrator link at the top of the page or when you are checking out.  Whether you sign in to your account or checkout as a guest, if you don't select a demonstrator one will be assigned for you. 

I hope you enjoy all the new features.  I appreciate your business and want to continue offering you amazing products and my personal service, so please be sure to update your preferred demonstrator selection.

Happy Stamping!


Christy Frank


Key Features of the New Online Store

New Store - Sign-in 
See the picture with the Sign In steps above. 
1. Click Sign In

2. Sign in with email and password 

3. Click the Forgot Password link if you need to reset your password.

Improved Navigation

It’s easier to find what you are looking for with navigation menus that expand. For example, the image shows what happens if you select “Stamps” from the Featured Products section. You can then narrow down your search by Season, and then refine it even more with a specific season.

New Store - Navigation

Improved Filtering

When you are shopping you’ll see Filter By in the menu on the left. You can Filter By several options including size, price, product type, occasion, color, etc.

New Store - Filter


Wish List & Favorites List

You can also add items to a new list or Wish List from the quick view page, not just the individual product page. You could track product you already have on hand.

New Store - Wish List


Filter & Sort by Color

If you click on the Shop By Color link you’ll see every color listed. Click on the color to see the products available in that color.


New Store - Colors


Ornate Garden DSP & Daisies!


The Ornate Garden Suite is one of my favorites in the new catalog! The colors and floral patterns remind me so much of colors and fabric prints from the 70's. My bedroom had olive colored shag carpet! Our kitchen was avocado green with golds and yellows. I wouldn't say that I like those colors now, but I do love how Stampin' Up! brings back vintage looks in a fresh new way!


I also love how all the products can be mixed and matched to get the most versality for your crafting investment. When I saw this DSP pattern, I knew that I had to pair it with the daisy stamp and punches. And how could I not use this Ornate Border die that looks just like daisies? There are so many creative ways to use this suite, and when I can use something I already own, you know the suite was on my must have list!


Card Recipe


Cut List


Old Olive Cardstock:
5 1/2" 8 1/2", scored at 4 1/4"
Cut the daisy peek through border from the Ornate Border Dies and place it 1/2" in from the left edge of the card base, run through your cutting machine


Whisper White Cardstock:
1 - 4 1/4" x 5 1/2"
1 - 4" x 5 1/4"
1 - 3 x 11, punch 2 daisies with Daisy punch & 4 daisies with Medium Daisy punch
1 - 2 1/2" square, use 2" circle punch to punch out the circle after stamping the sentiment


Terracotta Tile:
1 3" square, punch circle with 2 1/4" circle punch for matting the sentiment


Ornate Garden DSP:
2 1/4" x 5 1/2"


Stamping


Daisies:

1. Use the larger daisy image from the Daisy Lane stamp set to stamp two daisies in Terracotta Tile ink on the 3" x 11" Whisper White Cardstock
2. Use the smaller daisy image from the Daisy Lane stamp set to stamp four daisies in Bumblebee ink on the 3" x 11" Whisper White Cardstock (note - I stamped off each time for these)
3. Use both daisy punches to punch out the daisies

Sentiment:

1. The sentiment is stamped in Terracotta Tile.
2. I used a retired sentiment on this card; however, the Daisy Lane stamp set has wonderful sentiments that will fit on the circle. If you are wanting the word hugs specifically, the Positive Thoughts stamp set has a sentiment that says "Hugs Love Prayers" and it will work too.

Assembly

1. Adhere the 4 1/4" x 5 1/2" piece of Whisper White cardstock behind the card front using multipurpose glue or Stampin' Seal.

2. Adhere the DSP strip to the card front placing it about an eighth of an inch in from the left edge of the card front using multipurpose glue or Stampin' Seal.

3. Offsetting the petals, layer together each pair of daisies using a glue dot or dimensional to attach the layers together.

4. Adhere your sentiment circle to the Terracotta mat and use dimensionals to adhere it to the card.

5. Arrange and adhere the daisies to the card using multipurpose glue or Stampin' Seal.

6. Adhere the 4" x 5 1/4" Whisper White cardstock to the inside of the card using multipurpose glue or Stampin' Seal.

Finishing Touches

1. I used Old Olive Dark Stampin' Blend to color three basic rhinestones and arranged these around my sentiment.


Pretty Spring Cards


Have you tried using the Scalloped Notecards yet? I love how versatile these are and how they go with so many different Designer Series Papers. When I saw the limited edition Pleased As Punch DSP, I knew it would go perfectly with these notecards! The paper is so bright and cheerful.  The pretty colors and scalloped edges of the notecards compliment the imagery of the DSP nicely. At $8.00 for a set of 20 cards the notecards and matching envelopes are an amazing value!


This card above was the quickest card of the bunch! I layered at strip of the bloom patterned DSP cut at 2 3/8” x 5” onto the card base.  I had spare pieces of the Daffodil Delight and Whisper White labels cut from the Stitched So Sweetly dies that were left over from a class. I layered these on the DSP adding a strip of the Terracotta Tile linen ribbon between them. 


The sentiment is from the Under My Umbrella stamp set and is stamped in Terracotta Tile. I used the Small Bloom Punch, a free SAB gift, to punch three blooms to accent the sentiment. Of course I had to add some sparkle using the Holiday Rhinestones in yellow. I love the cheerful look of this card!


This was a quick and easy card too. I used the Tulip Builder Punch and Stitched So Sweetly dies to Create this design. The Ruched Daffodil Delight ribbon anchors the sentiment perfectly. The leaves on the outer edges are attached directly to the Whisper White background. The right and left tulips are glued on top of the leaves. The center tulip and leaf are popped up on dimensionals and the sentiment is as well. I inked the edges of the sentiment label for depth and finished it with yellow rhinestones. This design is great for a thank you, Mother’s Day or birthday card too!


Oh my gosh, I just love the raindrop pattern! I used the Under My Umbrella bundle to make this sweet card. The umbrella is punched from the DSP and the boots are stamped twice and fussy cut - I layered the left boot on top of the second image to the boots to give more depth.


Then I stamped 2 of the large flower grouping and 4 of the small To add flowers to the umbrella and boots. The flowers are colored in coordinating shades with Stampin’ Blends and fussy cut - did I say that I love fussy cutting? I do - it is so relaxing and fun!  The sentiment is stamped on a scrap in Balmy Blue and fussy cut too.  I created a frame by layering two of the scalloped rectangle shapes from the Stitched So Sweetly dies. I added more sparkly goodness with Basic Rhinestones for centers on the larger flowers. This card is perfect for a shower, to give encouragement or just to say Hi!


This tulip card card is my favorite of this set! The basket is made by embossing a piece of Crumb Cake Cardstock using the Coastal Weave Embossing Folder which I inked with Early Espresso. I cut the piece to a 2” x 1.5” rectangle then angled it. The edge of the basket is 3/8” x 2.25”. I tied a piece of linen thread around the basket before adding the sentiment - tip, use a glue dot on the back to help secure the thread so you can tie the bow. The sentiment is stamped in Petal Pink.


To make the stems, I curved the straight stem in the Timeless Tulips stamps set as I mounted it to the block - don’t you love photopolymer stamps???  I used Old Olive and stamped off. Then I fussy cut the stems. I glued the top of the stem under the tulip and then glued the bottom of the stem to the card base leaving the center to be raised up giving a 3D effect.  To give the tulips a double bloom effect, I used the Tulip Builder Punch to make extra petals that are layered under the main bloom. To get the right and left petals to appear mirrored, I turned one tulip upside down in the punch and then I punched it. To make the leaves I punched each one twice to make them slightly narrower. I think that size is the best fit for the notecard! And to add some shiny goodness, I added two of the pink rhinestones from the Noble Peacock Rhinestones. The sentiment is stamped on the smallest label in the Stitched So Sweetly dies.


Who wouldn’t love having one of these cute cards waiting for them in their mailbox?  Let me know which card is your favorite in the comments below.


Don’t miss out on the Pleased As Punch DSP - it is available until March 31st, or while supplies last. You can shop for the paper and all the supplies to create these cards by clicking on the products below. 


If you order the first five items below, you can select the small bloom punch as a level 2 Sale-A-Bration gift. And you will have the paper and tools to make 20 cards!


Product List

Paper Pumpkin Is Turning 7!

Happy Birthday Paper Pumpkin!!


Cheers to seven years! This March, Paper Pumpkin has reached another exciting milestone: seven years of delivering fun, easy, creative projects right to your door. To thank everyone who has helped us along the way, we’re including an additional FREE stamp set with every March kit. This means that every subscriber will receive two stamp sets!
The March 2020 kit will arrive in an exclusive, specially-designed box - see the sneak peek above! Think daffodils, raindrops, and a fresh spring vibe.

About the March Kit
  •        Kit contains supplies for 12 cards and envelopes (4 cards of 3 designs)
  •         Notecard size: 5" x 3-1/2" (12.7 x 8.9 cm)
  •         Envelope size: 5-1/8" x 3-5/8" (13 x 9.2 cm)


Coordinating Colors: Balmy Blue, Basic Gray, Calypso Coral, Grapefruit Grove, Gray Granite, Pear Pizzazz, Petal Pink, Shaded Spruce, and So Saffron


About the FREE Stamp Set
  • The additional stamp set is a great value and coordinates with the March kit design; however, you do not need it to complete the March cards.
  •  The additional stamp set is a 4x6 footprint, which is larger than most Paper Pumpkin sets and is designed for use on a variety of crafting projects.
Subscribe by March 10th to get this special edition kit!


Paper Pumpkin + Sale-A-Bration = Savings & Free Stuff!!


Have you been wanting to try a Paper Pumpkin Subscription?  Now is the perfect time to start!  When you purchase a 3, 6, or 12-month prepaid subscription, you earn FREE Sale-A-Bration product(s).  Don’t wait to get your prepaid subscription – Sale-A-Bration ends on March 31st!

Choose your preferred subscription method
  • Click the links below to get your 3, 6, or 12-month prepaid subscription & earn free Sale-A-Bration product(s)
  • Click here to subscribe month-to-month, $22.00/month, suspend or cancel at any time