I want to share my very first shaker card! To be honest, shaker cards seemed a bit intimidating to me. I recently ordered the Memories & More Merry Little Christmas card pack and was immediately inspired by the acetate overlay cards included in the pack. They just screamed shaker card to me! I decided to give it a try and here is the card. The came together quickly and was a lot less complicated than I thought.

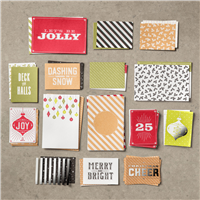
Here are a few of the cards in the Memories & More Merry Little Christmas card pack. I used the overlay card pictured here in the lower right hand corner. There are other overlay cards that can be used as a shaker card too. Wouldn't the silver ornament be perfect??? There are coordinating stickers in the pack and even some of these are trasparent like the overlays! These cards are so versatile - they make your pocket scrapbook pages pop, create quick easy cards, tags and, well more!

Check out the video below for a closer look at the cards and more project ideas. You get a lot of bang from this amazing $10.00 pack!!
Constructing the Card:
Card Base
- The base is a standard A2 card (4.25" x 5.5") in Basic Gray.
- The mat is cut to 4" x 5.25" using a scrap from my Year of Cheer DSP. I love the retro vibe of this print and it works perfectly with the bold font on the acetate card. I adhered this using Fast Fuse.
Shaker Element
- Cut a piece of whisper white cardstock to 3"x4" to match the size of the acetate card.
- I used the foam adhesive strips on all sides of the whisper white piece.
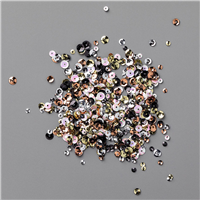
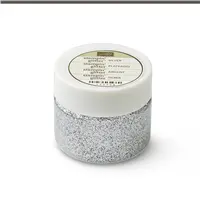
- I placed some silver stampin' glitter and some metallic sequins in iridescent and silver onto the Whisper White piece, being careful to keep them in the center so they would not stick to the foam when I attached the acetate card.
- I adhered the acetate panel to the top of the white piece making sure to line up the pieces so the sequins and glitter would be sealed in and not spill out. The foam is the right thickness to make the shaker work perfectly!
- I made a frame to for the acetate panel using basic gray cardstock. The outside measurements of the frame are 3 1/8" x 4 1/8". The inside of the frame is 2 1/8" tall by 3 3/8" wide. This makes the top and bottom edges of frame a tad wider than the sides. I used the measurements on the Stampin' trimmer to cut out the inside. I love that the guide has measurements that allow me to do this so quickly!
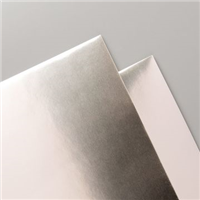
- The frame needed an extra something so I cut two strips of Champagne foil strip measuring 1/8" x 4 1/8". I attached the strips using the fine-tip glue pen centering each strip on the top and bottom edges of the frame. The foil strips complement the silver borders of the acetate card tying everything together.
- I used Fast Fuse to attach the shaker element to the card base. I just love how this turned out!

Supply List:
You'll find all of these Stampin' Up products in my Stampin' Up! online store by clicking on the items below: